Building a Laser Powered Flux Capacitor!

Read all about my experiments, inventions and general fun with everything from high powered lasers to electronics, flux capacitors and other scientific stuff.
Post Reply
User avatar
Danniielle
Site Admin
Posts: 111
Joined: Sun Jul 23, 2023 7:40 pm
Location: Adelaide
Contact:

Building a Laser Powered Flux Capacitor!

Post by Danniielle »

Sometimes when I am in my studio experimenting with musical ideas, I come up with something I wish I had recorded but didn't. Those are the times I could really do with a time machine! Anyone who knows anything about time travel knows the Flux Capacitor is what makes it possible so I decided to build one for my studio!

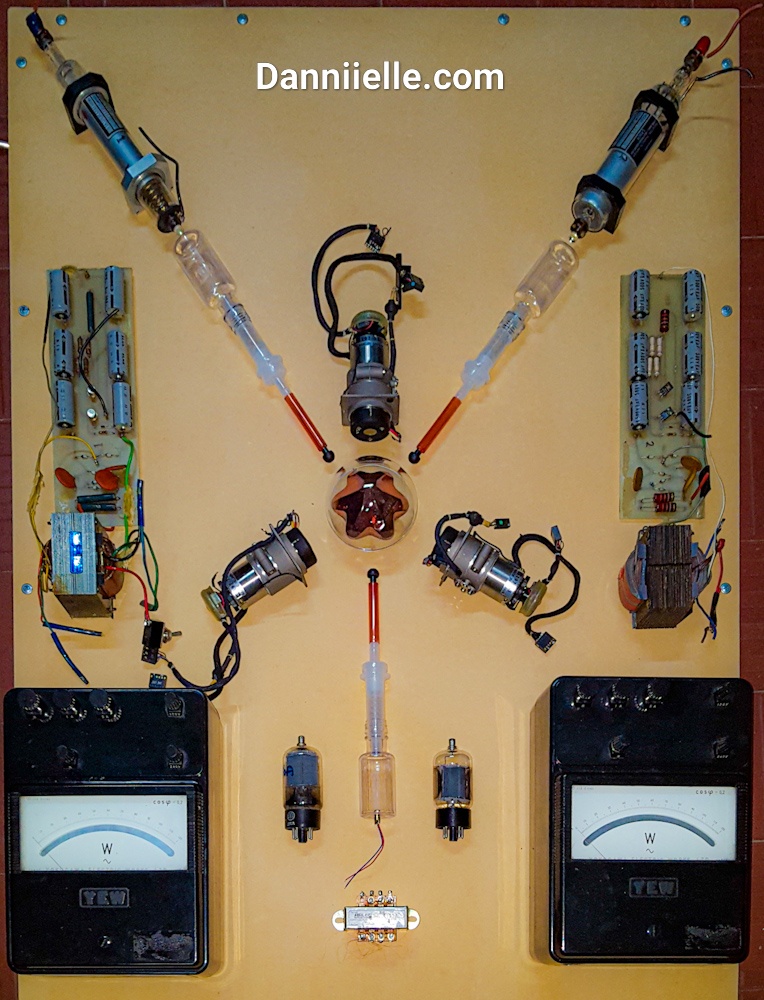
This one is based on the classic design by Doc Emmett Brown but with several modifications and upgrades given the advancements in technology since 1985. Mine doesn't run on Plutonium which is somewhat difficult to obtain. Instead, it uses lasers to excite a refined Dilithium crystal which creates the high frequency, high current electromagnetic field necessary to capture the time domain eddy currents accurately.

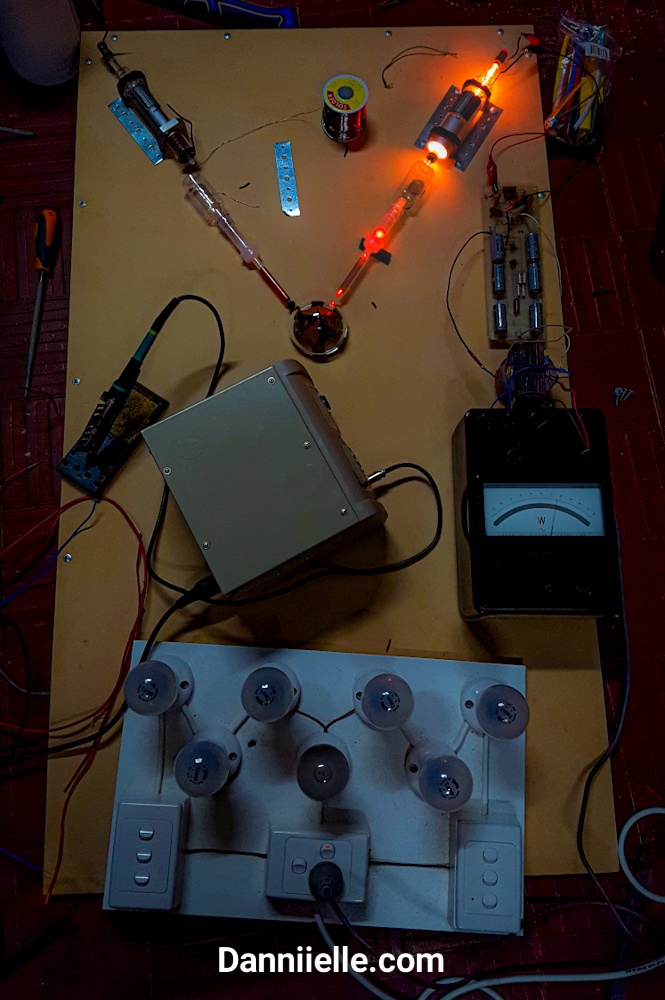
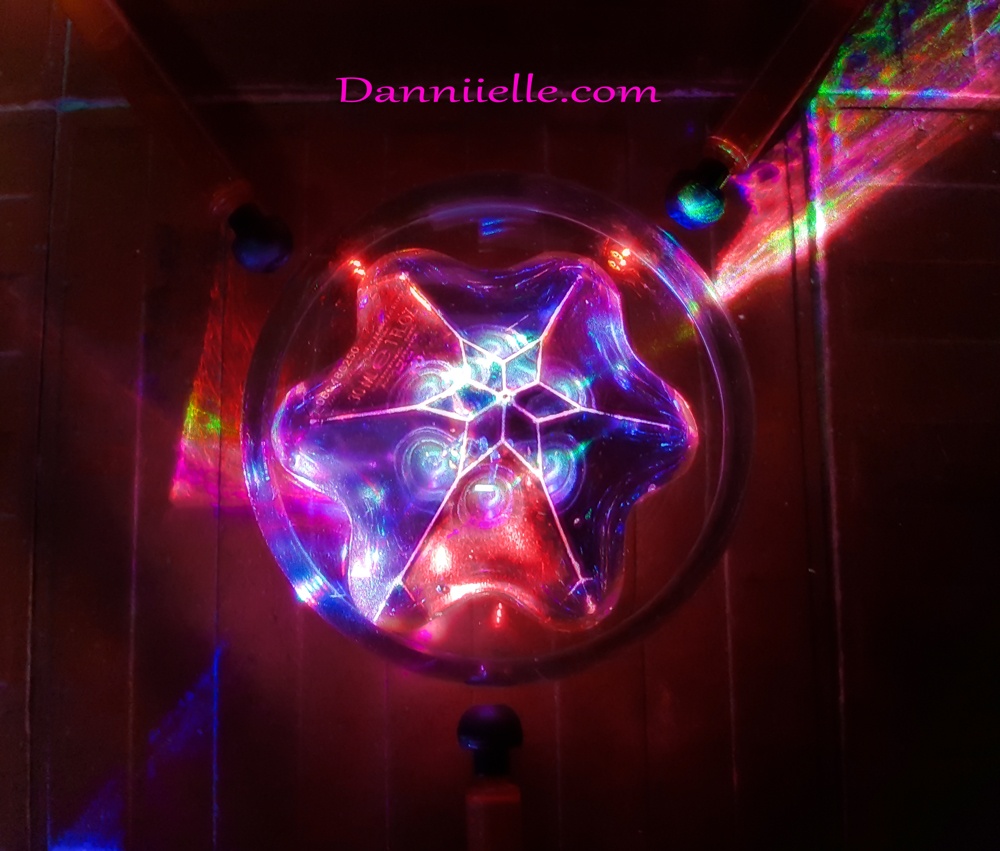
Here's a photo testing the response of the Dilithium crystal...
Image

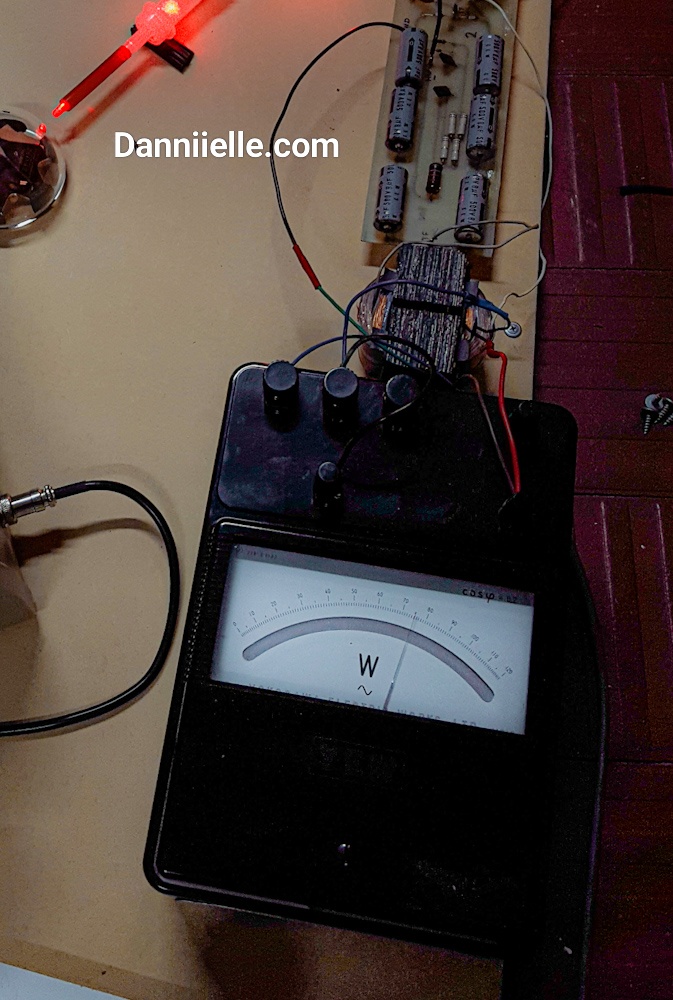
And a close-up of the crystal..
Image

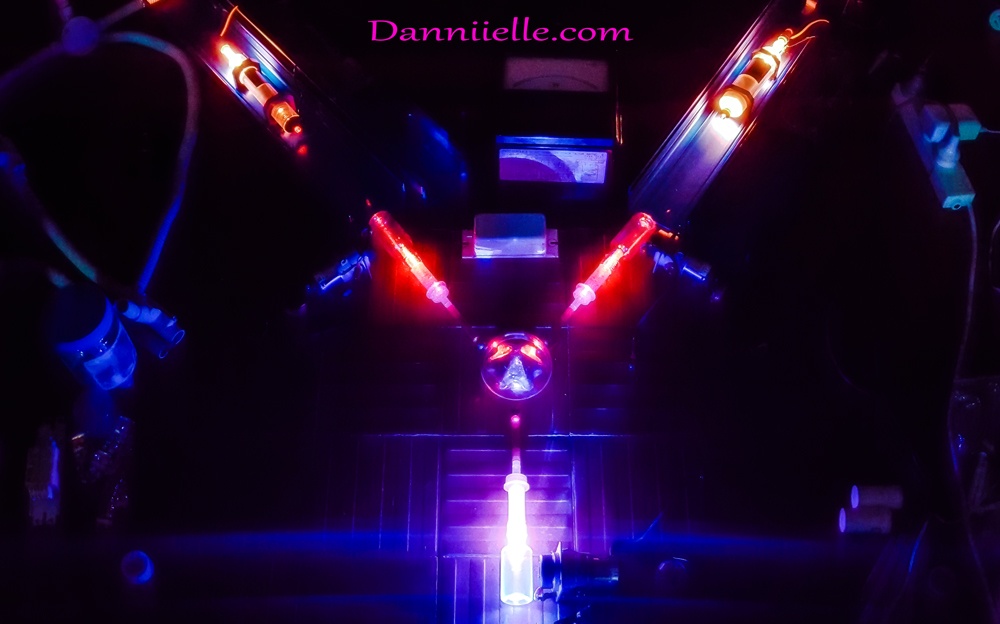
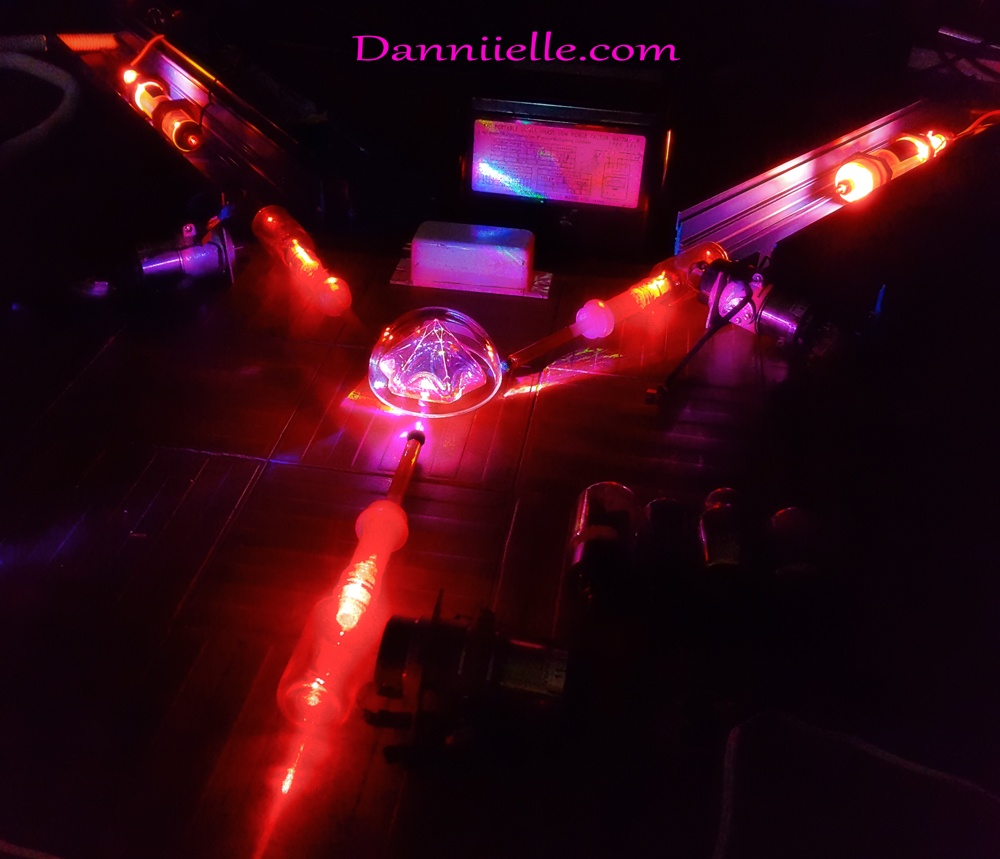
I'm using Hughes Industrial HeNe laser tubes for the top two primary exciter beams..
Image

I'll be using vacuum tubes for some of the control circuits mainly due to the fact that they are somewhat immune to electromagnetic pulses which are generated during time travel and can easily fry semiconductors. Four of these vacuum tubes can be seen to the right of the lower exciter rod here. Obviously they aren't doing anything just yet..
Image

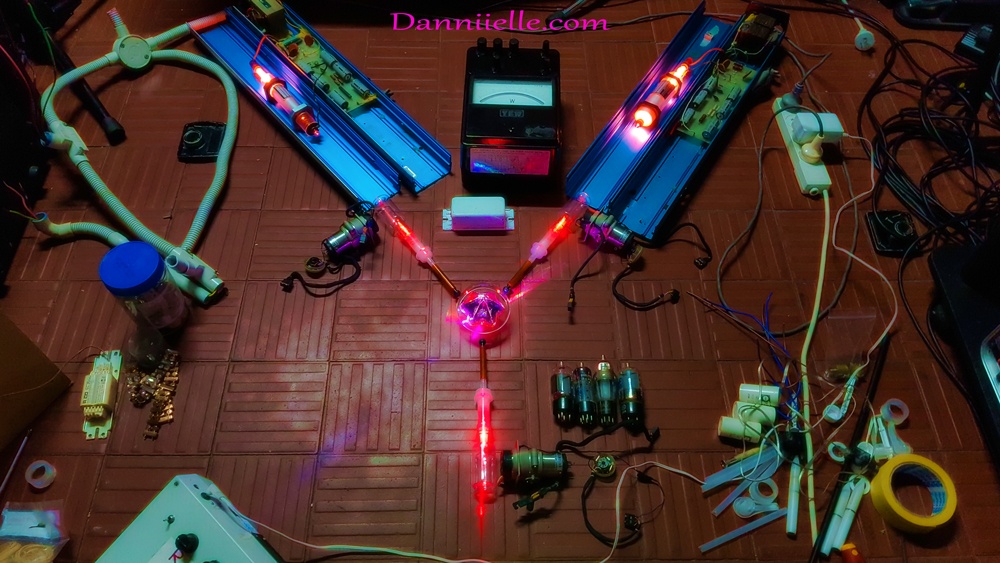
The exciter rod drivers are also vacuum tube based. There's three of them, one at the base of each exciter rod..
Image

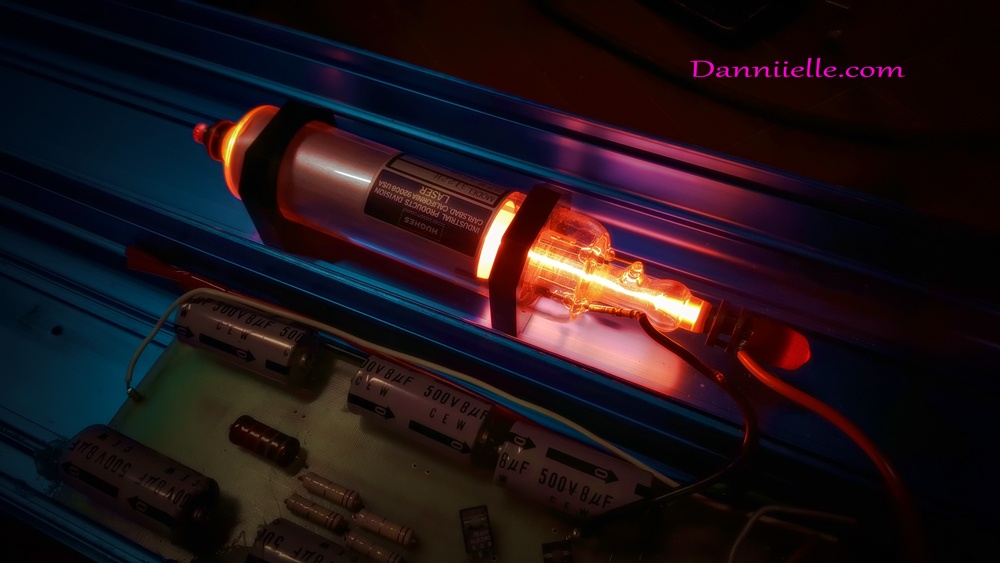
Here's a closer shot of the exciter rods and Dilithium crystal. I'm testing the lower one with my RGB laser here but it will use a fixed colour laser for the final build..
Image

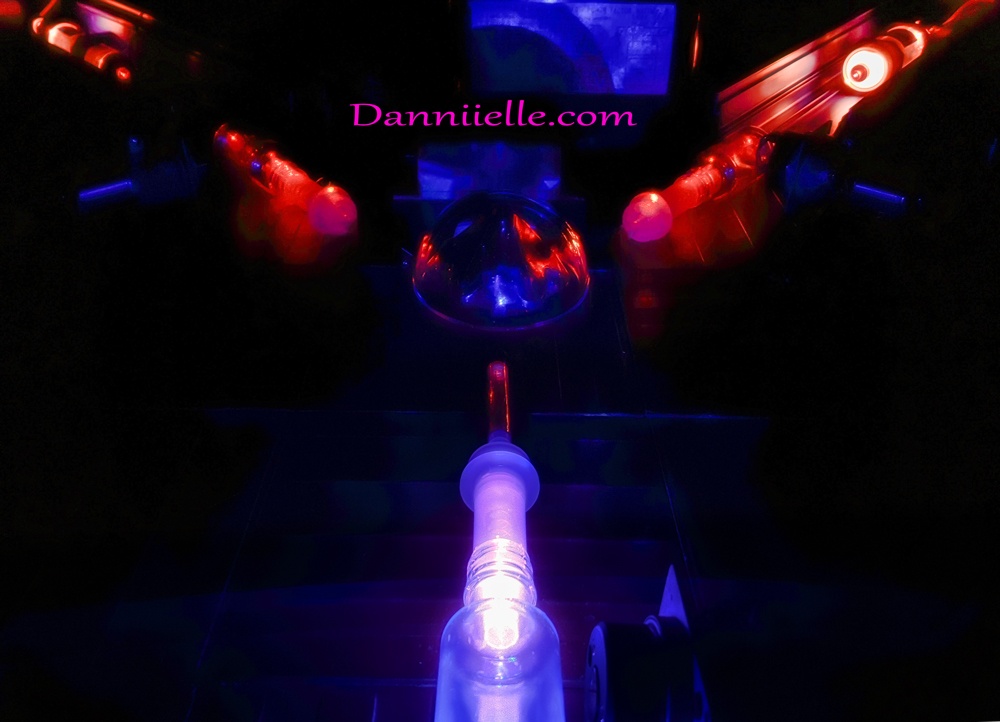
One more shot of the Dilithium crystal and exciter rods in action..
Image

Apparently, Jaycar Electronics here in Australia sell Flux Capacitors when stock is available in their warehouse. However, it is designed for automotive use rather than fixed installations and it is prohibitively expensive. The one I am building will cost me next to nothing because I already have the parts.

Here's the listing on their website..

https://www.jaycar.com.au/flux-capacitor/p/OUTATIME


Stay tuned for more updates as I continue this build.
User avatar
Danniielle
Site Admin
Posts: 111
Joined: Sun Jul 23, 2023 7:40 pm
Location: Adelaide
Contact:

Re: Building a Laser Powered Flux Capacitor!

Post by Danniielle »

I put together a base board for it today and laid out the main components to make sure everything will fit.

I also removed the laser tubes and their power supplies from the cases they were in because I won't be using those cases in this build. The laser power supplies are the two PCBs and the transformers on each side.

Below those are two Yokogawa Japanese AC mains watt meters which will display the power drawn by the laser tubes. The small transformer in between it will power the heaters in the vacuum tubes and the laser diode in the lower exciter rod. I might also use that to power the LED chaser lights for the three exciter rods too if there's enough current in reserve. If not, I may swap it for a larger transformer.

There's more to add and nothing is mounted permanently yet. I'll post more as progress continues.
Image
User avatar
Danniielle
Site Admin
Posts: 111
Joined: Sun Jul 23, 2023 7:40 pm
Location: Adelaide
Contact:

Re: Building a Laser Powered Flux Capacitor!

Post by Danniielle »

More progress on the build today. I mounted one of the HeNe laser tubes and the Dilithium crystal on the base board and tested one of the watt meters with it and all good.

The light bulb array is a series current limiting rig that places any or all of the bulbs in series with the load under test. If there's a fault, the bulbs light up and limit the current, thereby preventing catastrophic failure. If all is good, there's an override switch that connects the load directly to the mains.

I had the watt meter and laser power supply connected to this in case I made a mistake with the meter wiring. All worked perfectly first time so it seems I got it right. :)
Image

Closer view of the meter. It is showing a reading of 75 watts here but there's a multiplier of 0.4 with this configuration so the actual power consumption is 30 watts for this laser.
Image

And another one..
Image
User avatar
Danniielle
Site Admin
Posts: 111
Joined: Sun Jul 23, 2023 7:40 pm
Location: Adelaide
Contact:

Re: Building a Laser Powered Flux Capacitor!

Post by Danniielle »

On a serious note here, this project involves working with dangerous and potentially lethal voltages and power levels. On top of that, some of the lasers are class 4 and can cause permanent eye damage and blindness.

The input is AC mains (240v in Australia) and the lasers have a start voltage of around 8000v and operate at just under 1800v. Any of these can kill easily and quickly.

⚠️⚠️⚠️ DON'T attempt a project like this unless you absolutely know what you are doing!! ⚠️⚠️⚠️

I have a fire extinguisher and blanket here just in case. I am also qualified in electronics and have around four decades experience.
Image

One essential item for any Flux Capacitor build is a label maker. I picked up a great deal on this Dymo label maker at the supermarket yesterday for half price ($25 instead of $50). I got a couple of spare label cartridges also for half price.

Grabbed some more super glue too while I was there.
Image
User avatar
Danniielle
Site Admin
Posts: 111
Joined: Sun Jul 23, 2023 7:40 pm
Location: Adelaide
Contact:

Re: Building a Laser Powered Flux Capacitor!

Post by Danniielle »

Here's a couple of newer photos of where I'm at with this project.
Next up I'll be adding the LED light chasers under each of the three laser guides.
20220208_010328-01.jpeg
20220407_034020-01.jpeg
Post Reply